Saturday, January 24, 2015

Oiling Brightwork


January 18, 2015


With the painting of the hull complete, I was now ready to return to the brightwork.  The time had come to treat the teak wood with a sealer / preserver.  The owner had decided against a varnish for the brightwork, but the teak would need some conditioning and protection from the tough FL environment - chiefly UV protection.  Periodic application will serve to prolong the life of the sailing dinghy's new brightwork.  


The application is straight forward:  wipe on with a rag, wipe off residual oil with a secondary rag...."Daniel-son."  The bow thwart below has been treated with the oil while the port aft thwart has yet to be treated.


After all thwarts, and the stern rail, had been treated, I moved on to the rails.  Treating the rails would conclude the day's application.


As can be seen below, the mast thwart has yet to be treated due to additional scheduled work needed for final installation.


Total Time: .5 Hr

Tuesday, January 13, 2015

Fifth and Final Topcoat Application


January 11th, 2015


Determined to create a dust-free, or at least windless environment, I made a run to the big box hardware store the previous evening and purchased materials to this end.  I managed to persuade a couple employees to part with 40' of furring strip material for 30% of the retail price, and along with plastic sheeting 3.5mils thick, I was in business to eliminate the chance for a random gust of wind to ruin my best effort.  That evening, I went ahead and sealed the screened areas of the porch using the furring strips both at the top and bottom to secure the plastic sheeting.  It was an immediate improvement in the environment, and I'd be ready in the morning to prep the hull for its final topcoat.


Prior to breakfast, I donned a dust mask and hand-sanded the hull with 320-grit paper, making frequent paper changes to ensure a consistent surface prep.


Once I had finished the sanding, I vacuumed the hull thoroughly and then finished with a solvent wash to remove any remaining residue.  As I had done prior to the fourth topcoat application, I used a tack cloth to ensure the hull surface was a clean as possible.  Burning a little time, and to allow anything suspended in the air to settle, I went in for a little breakfast.  Now with the belly full, I returned to the workshop to prepare the paint: combining base and converter, along with a ~50% reducer by volume.  Yes, I bumped up the reducer a tad more.  My thought here was that I already had adequate paint thickness achieved on the hull, this final coat was more of an "appearance" coat, and finally, I was getting better and better results with the increase in reducer.


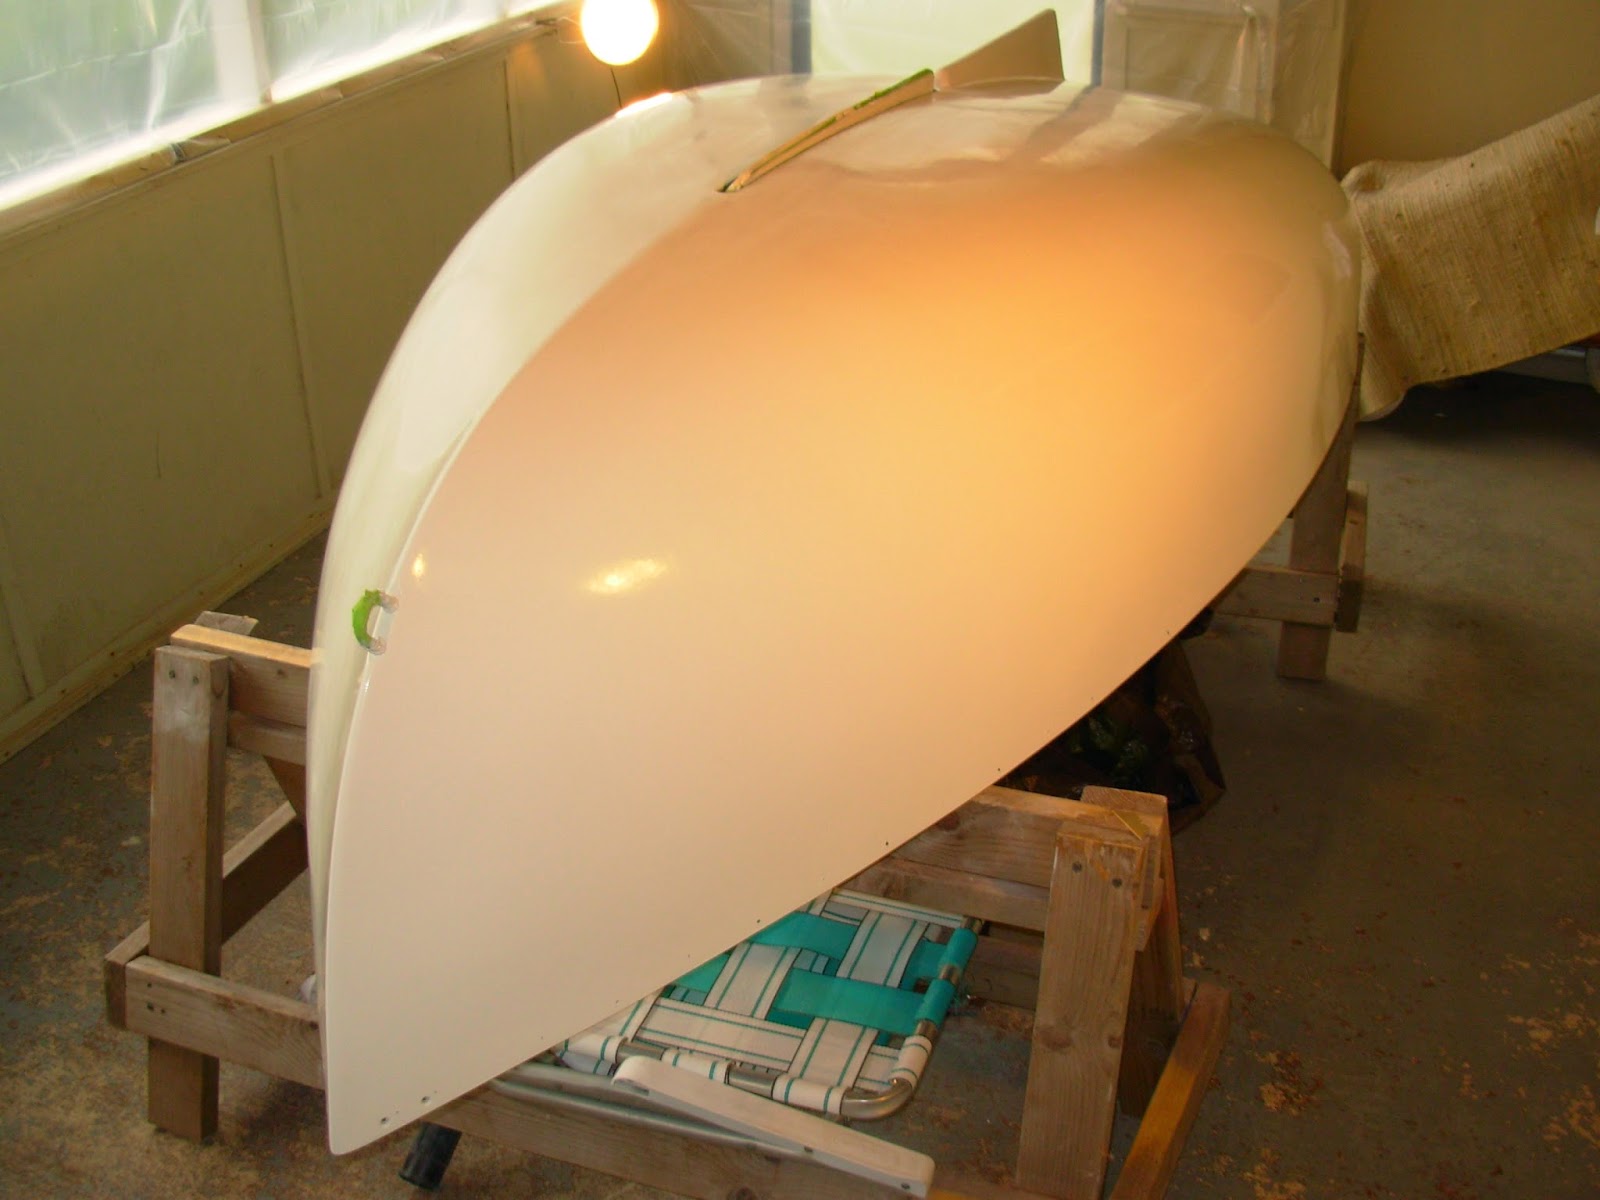
I finished mixing the paint and set it aside for the required 15-minute induction period.  While I waited through the induction period, I tacked off the hull one last time, and then changed into a fresh set of work clothes that I knew would be dust-free.  Finally, I grabbed my respirator and a fresh set of gloves and then set out to paint the sailing dinghy one last time.  As I had done the previous coats, I made my way around the hull making sure to paint off of a wet edge.  The lighting does not provide the best view, but this last topcoat application came out better than all previous applications.  I will allow the topcoat to cure over the coming days, prior to installing the new brightwork.  In the meantime, I will be treating the new brightwork with a teak sealer.  


Total Time: 1 Hour

Fourth Topcoat Application


January 10, 2015


Picking up where I had left off with the application of the third topcoat, I began by sanding the hull with 320-grit paper by hand.  After vacuuming the hull to remove most of the sanding dust, I came back with solvent to wipe the hull in order to remove the remaining residues from the sanding.  I also chose to utilize a tack cloth to further my effort to ride the surfaces of all particles that could spell disaster for the curing topcoat.  Over the coarse of the topcoat applications I had been adjusting the amount of reducer and now felt that I had reached an acceptable ratio.  I planned this fourth coat to be the final topcoat.


After mixing the topcoat base and converter, I added the reducer - thinning the base and converter volume by about 45% (higher than what the Alexseal technical data sheet called for).  As I awaited the required ~15 minute induction period, I applied the tack cloth one final time and then donned my respirator and fresh gloves.  


I made my way around the hull, starting at the starboard bow and finishing at the port stern.  After cleaning up and letting things cure for a bit, I made my way over to the hull for an opportunity to see how the paint was laying down and if imperfections surfaced.  Yep, there they were!  Dust particles had found there way onto the glossy, mirror-like finish; pulled into the paint as if on a string.  What I chose to ignore, hoping for the best, was that the wind was up on this painting day, resulting in the barrage of dust particles.  Plans were already being framed in my mind to prevent this for the next, and final, topcoat application.


Total Time: 1 Hour